


DIY Wreath:
Supplies:
- A box wire-type wreath frame
- A small sheet of red fabric
- 2-3 large sheets of green fabric (Around 225 square inches in total, preferably of different shades of green)
- A small amount of string
- A hot glue gun and glue sticks
- Scissors
*I used felt because it is firm, easy to work with, and holds its shape, but other fabrics should work fine
*I used a relatively small frame. If using a larger frame (quite a few inches wider/taller than your head), you’ll need more felt.
Steps: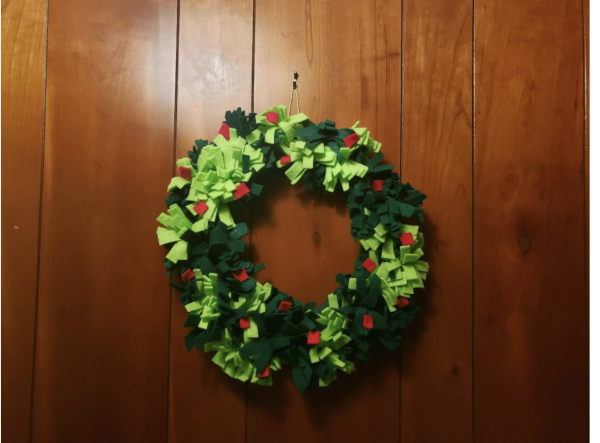
- Cut some of your fabric into wide and short strips that are long enough to wrap around one side of the frame, but not go all the way around. Mine were about 4 inches long and 3 inches wide.
- Use a hot glue gun to attach these to the front of the frame, tucking the ends around and gluing the tips there onto the back of the frame so they are out of sight. At the end of this step, your frame should hold the same shape but instead of wire it is a solid green surface of felt.
- Use the rest of your green fabric to cut strips of whatever size or length you prefer. Smaller strips generally are more work and more felt, but a bit prettier.
- When you’ve finished cutting your strips, take each strip and individually make many cuts into one of the long sides of the strip, leaving about a centimeter of space from cutting all the way through. They’ll look sort of like those things at a car wash if your car wasn’t very tall and extremely wide.
- One at a time, roll the strips into a tight spiral so one end is of solid felt and the other is made up of all the little cut strips. Apply a generous amount of hot glue on the bottom part with the solid felt while maintaining a strong grip on the spiral. (Depending on the fabric you use, it might be necessary to put a little dot of glue at the end of the strip before you finish rolling it so it doesn’t unroll.) Press the glued side down onto the frame anywhere, and hold still for a few seconds while the glue cools and hardens. Repeat this until you’ve used all of your felt. Your wreath should be about 90% covered, but if you feel that it is looking too sparse, press down on the tops of each roll to flatten the cut strips outwards.
- Cut your red fabric into some small squares or circles and hot glue them onto the wreath for a bit of a break from the monochrome.
- Use a small piece of string/yarn/rope/etc. and make a loop. Glue the loop down on the back of the wreath close to the edge so that it can be used to hang the wreath.
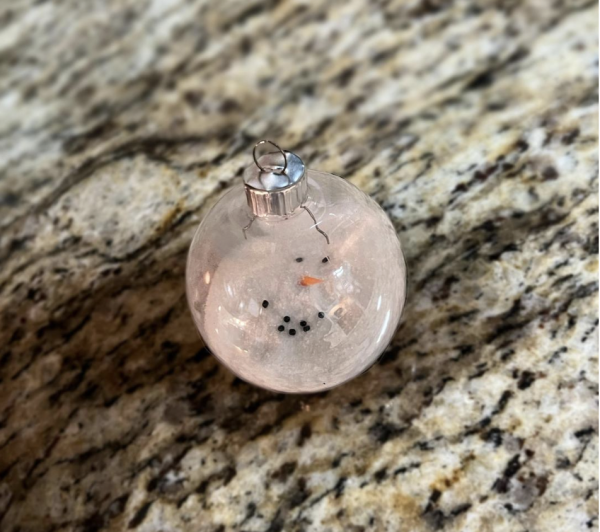
DIY Ornament- Melted Snowman:
Supplies:
- Empty plastic ornament with a removable top (I found some at Michael’s)
- Granulated sugar
- Something long and pointy, a straightened paper clip for example
- Some small, round black things. I used beads, but peppercorns look very cute too.
- A small amount of orange paper
- Scissors
Steps:
- Remove the lid of the ornament and fill it ⅓-⅔ the way with granulated sugar.
- Drop in 5-10 black beads and a small orange triangle cut from the orange paper
- Use something long and pointy to carefully orientate everything to look how you’d like.
- Place the top back on and be sure not to jostle it too much. The insides will stay mostly in place as long as it isn’t shaken or dropped, and it doesn’t store very well.
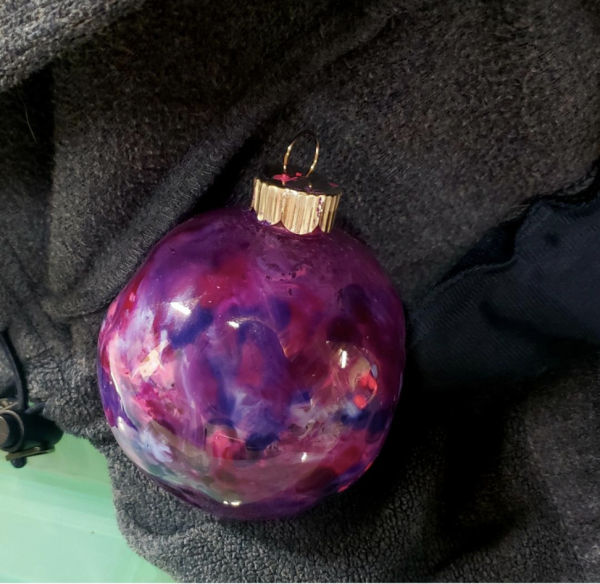
DIY Ornament- Crayon Marble
Supplies:
- Empty plastic ornament with a removable top (I found some at Michael’s)
- A few crayons, preferably of different colors
- A big, heavy knife (Obviously exercise caution)
- A cutting board
- A hair-drier or something else that can blow hot air. I definitely do NOT recommend the oven and especially the microwave as it might react with the metals in the lid.
- Hot glue gun and glue sticks
Steps:
- Unwrap the crayons if they still have wrappers on them. If this is hard to do, submerging them in water for a few minutes will soften the paper but have no effect on the wax itself.
- Chop them up into pieces that are very small but not dust.
- Dump the crayon bits into the ornament. The total amount of crayon bits is ideally somewhere around the equivalent of one average sized Crayola crayon, but just little bits of many colors.
- Liberally apply hot glue to the lid of the ornament and fasten it on.
- Use the hairdrier and hold it to the bottom of the ornament. Be careful and watch for any melting plastic or fire hazards and keep your hands out of the hot air (The setting should be on the hottest level). After some time, begin to slowly rotate the ornament. The crayon pieces should move with it, but they’ll have started to become soft and will leave trails of color behind as they move. Continue until the whole ornament is colorful with crayon. This will take a while and lots of patience. Depending on the ornament you purchase, some warping of the plastic ranges from possible to inevitable. Warping isn’t bad, and can actually make the ornament a lot more interesting, but serious warping can lead to weak plastic once dry that might break.
- Give the ornament time to cool; plastic is surprisingly hot when exposed to hair-driers.